


Key Takeaways
- Start turnover planning before lease end so your team can inspect, assign repairs, clean, and hand off keys without extending vacancy days.
- Document the unit from ceiling to floors, including leaks, switches, pests, paint, appliances, and tenant belongings, then follow state rules before disposal.
- Track appliance make, model, serial number, purchase cost, warranty, and service history so repair-or-replace decisions stay consistent across growing portfolios.
- Prioritize pest-free cleaning, lock changes, and final photo or video documentation, especially since one cited study found bed bugs in 45% of sampled apartments.
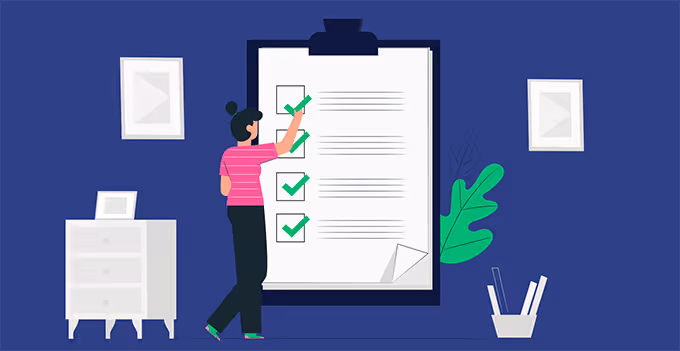
Welcome to the ultimate cleaning and maintenance checklist for apartments, houses, offices, and any type of rental property. This article was written by property managers for property managers, landlords, owners, and investors.
Whether you’re getting started with your first rental unit, or you have thousands with your own property management company, this checklist will ensure you never forget a thing when making your units move-in ready for the next tenant.
Even before your tenant moves out and the lease expires, you need to start working on your apartment turnover cleaning and maintenance checklist. It is important to make a plan and template before diving in without direction. The second the tenant’s lease is up, you must be ready to go, with your clipboard and make ready checklist template printed out (or on a phone or tablet).
When you’re doing your walk-through of the unit, you must look for all the potential issues, note them down and start working on them (or charge your previous tenant!). Once done with all the repairs, maintenance, and cleaning, and hopefully there won’t be too many, then you can officially hand over the keys to the next tenant. This is what defines an apartment turnover.
Move-Out Inspection
The very first task is to inspect the apartment from a tenant’s point of view. As soon as you step foot in the apartment, look for anything that sticks out and anything out of the ordinary that catches your eye and will catch another tenant’s eye.
This is also a good time to mention that you need to determine if you will charge your tenants for normal wear-and-tear or things out of their control.
- Starting with the ceiling, check for any cracks or leaks. Focus on any cracks in the walls as water will seep out and cause further erosion.
- Look for any broken lights or ceiling fans that may need an electrician.
- Make sure all light switches and remotes work (including TVs and sound systems).
- Assess the water pipes, faucets, and toilets for any damages or leaks that may require a professional plumber or plumbing company.
- Check all window shades, curtains and blinds to see if any are broken or missing, and if they can still be opened and closed.
- Look for any rotten furniture or wooden items that need to be repaired or replaced.
- Check the condition of the garden and lawn if applicable.
- Inspect the walls and ceiling for anywhere that needs repainting.
- Make sure the floors and carpets are not damaged.
- Check inside cabinets or atop counters for any bugs or bug droppings that can be an infestation of ants, flies, or worse...termites!
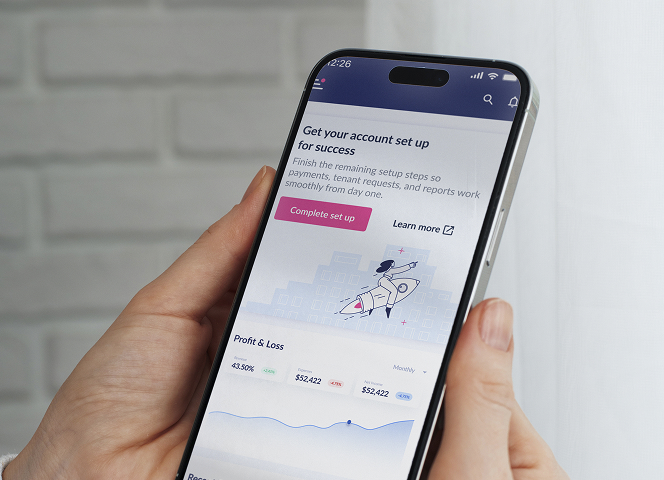
Use DoorLoop's AI Inspections for Move-Out Inspections
DoorLoop's AI Inspections feature make this whole process a lot faster and cleaner. You do the walkthrough on your phone, capture photos as you go, and the AI turns them into a standardized, timestamped report without you having to stop and organize notes. Any issues you flag can be converted into work orders automatically, with the inspection details already attached. And when a tenant disputes a deduction, you've got a clean, photo-backed report that's hard to argue with.
Remove Belongings
There is a high probability that your previous tenants left some of their belongings behind. First, decide how much you will charge them for leaving anything unless it adds value to your future tenants.
Before discarding anything in the trash, check your state laws to see if anything needs to be done beforehand.
Here is what you can do with everything left behind:
- Make a complete list of all the items so that you have a record of it.
- Take special care of any fragile items that you want to save or sell.
- Notify the tenants in writing on how and where to reclaim their belongings, and the cost.
- Give them a deadline to collect their possessions.
- Be clear that in case of non-compliance, their belongings will be legally abandoned and they will be responsible for the costs of removal (usually taken out of their security deposit).
If you’re still unsure of what to do or if the tenant hasn’t responded, then consult a lawyer.
Repair Damages
If you don’t have a dedicated handyman, you can do basic repairs yourself like fixing leaky faucets, clogged toilets, stuck windows, sealing joints or seams against leaks. Just search Google or YouTube and you will find tons of DIY tutorials for these basic repairs that will also save you some money.
Other examples include:
- Replacing the air filters.
- Making sure your smoke detectors and carbon monoxide alarms are working properly.
- Cleaning carpet stains or removing odors.
- Tightening any loose screws or cables.
- Assessing for leaks.
- Replacing dead batteries in remotes or other devices.
Paint
Now that all the damages are repaired, pay attention to the walls. Make sure to deal with any holes, scrapes, discoloration, burn marks, chipping, or any other issues that need repair. Once again, Mr. Clean’s Magic Eraser can handle most wall stains. For anything more, you may need to do some minor (or major) painting, especially if you need to fix holes or dents in a wall with plaster or joint compound.
Lastly, make sure you choose the exact same time of paint finish including the same color code, manufacturer, and sheen. I learned this the hard way when I walked into Sherwin-Williams and was presented with over 100 different versions of white! Every color can come in different sheens and glossiness like satin, eggshell, flat, matte, and more, so make sure you’re matching the correct color.
If you don’t know your correct color, you can chip a small piece off your wall (a 1 inch by 1 inch should be fine), and bring it into Home Depot to color match it for you. They have a special machine that will identify the exact color match.

Replace or Repair Appliances
It’s time to replace any damaged or outdated appliances. If you’re using a property management software or inventory/appliance tracking system, you should keep track of the following details for every appliance in every unit:
- The make, model, and serial number
- The date purchased and cost
- When the warranty expires
- When it was last serviced and by whom
Remember not to throw the appliances out right away! If you purchase a new appliance from Best Buy or Home Depot for example, they may even haul your old appliance out free of charge. How’s that for convenience?!
Your appliance checklist is as follows:
- Check all the appliances to make sure they are working properly. Turn on the stoves, microwaves, ovens, dishwasher, dryers, laundry machines, refrigerator, ice machine in the freezer, etc...
- Fix any appliances if they are broken. Replace them if they are not functioning at all or if the cost to repair is greater than the cost to replace.
Cleaning
According to research published in the Journal of Economic Entomology, in a sample test building, 101 out of 223 apartments were infested with Bed Bugs. That’s 45%!!
So after repairing or replacing all the appliances, the next step is to wash and scrub the whole apartment thoroughly. From the kitchen to every bathroom in the apartment. From every cabinet to every door. Scrub all the walls, floors, ceilings, sinks and counters. Ensure that a rental is pest-free before anyone moves in. Wash all the carpets. The drying time for carpets can vary between 2 and 24 hours, depending on ventilation in the room, humidity and material used.
Make sure there are no lingering smells left behind. Now that you are done with all the cleaning, there is just one step left before bringing in new residents.
New Locks
This could either by step 7, or even step 2. I personally would do this right away as soon as they move out.
For the safety of your new residents, change the locks and get new keys because you never know if your previous residents kept a copy of the keys. Remember to make a copy of the keys for yourself as well. It might come in handy in-case of an emergency.
Key.me: Another great option is to find a Key.me Kiosk near you that allows you to create copies of your keys instantly, and even save them digitally for future copying. Some Bed Bath and Beyonds, 7-Eleven, and Home Depot stores have them for example.

And if you want to get really fancy, consider a smart door lock. Besides being another modern technological benefit you can offer your tenant, there are even more benefits that may not be so obvious until you own a smart door lock yourself.
Benefits of smart door locks include:
- Allows you to easily change the codes for the next tenant for greater security.
- They will never lose or need to pay for a replacement key.
- They will never get locked out of their apartment.
- They can create guest codes for visitors or vendors like cleaning, exterminators, pet walkers, babysitters, and more.
I personally have the Schlage Connect Century Touchscreen Deadbolt and it’s been a game changer.

You may want to consider getting a smart lock that also has an option to use a physical key in case the lock doesn’t operate properly, they forget the code, the batteries die. Certain religions also can not use electricity or operate a smart lock on certain holidays.
Final Step
As a last and final step and once everything has been completed, take pictures and a video of the entire apartment as a reference for when the next tenant moves in. When they move out, you can use these pictures and videos to show them proof of any damages.
Now it’s time to hand over the keys!
Frequently Asked Questions